When making views in Xcode Storyboards it can be frustrating not being able to see any work you have done using code or not being able to change run time attributes like corner radiuses. For the latter you could use User Defined Runtime Attributes but there is no auto-complete so errors are likely and personally I don’t find it that friendly.
Fortunately, Xcode has some added features to allow us to see what views we are working on in real time and to be able to change run time values very easily, all in Storyboards.
So to get started create a new Swift single view application and add a new UIView to the empty View Controller. Make it fill most of the View Controller.
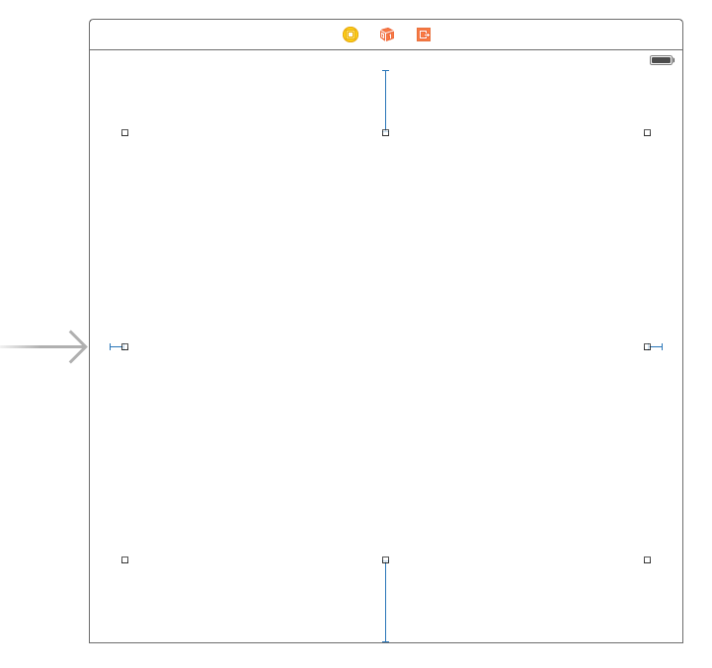
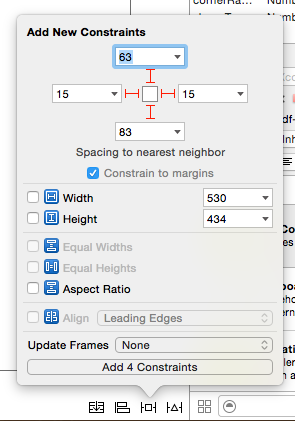
Add some basic constraints (this way it doesn’t matter what your target device is).
Now make a new Swift class that subclasses UIView and add the below to it.
import UIKit

@IBDesignable class TestView: UIView
{
	@IBInspectable var viewBackgroundColor: UIColor?
	{
		didSet
		{
			layer.backgroundColor = viewBackgroundColor?.CGColor
		}
	}

	@IBInspectable var cornerRadius: CGFloat = 0
	{
		didSet
		{
			layer.cornerRadius = cornerRadius
		}
	}
}
There is some new terminology here so lets go through that first.
@IBDesignable – This tells Xcode that the view is to be rendered in the Storyboard editor, so there is no need to keep building and running the project to see simple view changes.
@IBInspectable – Allows us to access the property from the Attribute Inspector when the view is highlighted.
The rest of the code is simply creating two new properties,viewBackgroundColour and cornerRadius. We then use didset to change the view’s corresponding properties when either cornerRadius or viewBackgroundColour are changed.
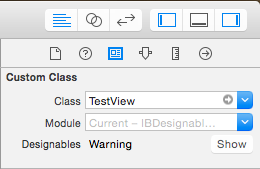
Go back into your Storyboard and select the new UIView you created. Open the Identity Inspector and set the UIView’s class to be your new view class, in this case TestView.
Open the Attribute Inspector and you should be greeted by two new attributes at the top of the Attributes view window. Change either of the attributes and you should see the view change to match the changes almost immediately.

Good but it could do more. Make a new Swift class called ShapeView and copy the below code into it.
import UIKit

class ShapeView: UIView
{
	var shapeColor: UIColor?

	override init(frame: CGRect)
	{
		super.init(frame: frame)
		self.backgroundColor = UIColor.clearColor()
	}

	required init(coder aDecoder: NSCoder)
	{
		super.init(coder: aDecoder)
	}
}
This new class is going to be a base class for some shape objects. Each subclass will implement the drawRect function and will be initialised with a frame. The only property that we will set will be the shapeColor, the background color will remain clear so the background view isn’t obscured.
Now make two further swift files like the below, which are the subclasses of ShapeView.
import UIKit

class CircleView: ShapeView
{
    override func drawRect(rect: CGRect)
	{
		let context = UIGraphicsGetCurrentContext();

		CGContextSetLineWidth(context, 5.0);
		shapeColor?.set()

		CGContextAddArc(context, (frame.size.width)/2, frame.size.height/2, (frame.size.width - 10)/2, (frame.size.height - 10)/2, CGFloat(M_PI * 2.0), 1)

		CGContextStrokePath(context);
    }
}
import UIKit

class CrossView: ShapeView
{
	override func drawRect(rect: CGRect)
	{
		let context = UIGraphicsGetCurrentContext();

		CGContextMoveToPoint(context, 0, 0)
		CGContextAddLineToPoint(context, rect.width, rect.height)
		CGContextMoveToPoint(context, rect.width, 0)
		CGContextAddLineToPoint(context, 0, rect.height)

		shapeColor?.set()
		CGContextSetLineWidth(context, 5.0);
		CGContextStrokePath(context);
	}
}
Now all we need to do is change our TestView class to add the new features.
import UIKit

@IBDesignable class TestView: UIView
{
	@IBInspectable var viewBackgroundColor: UIColor?
	{
		didSet
		{
			layer.backgroundColor = viewBackgroundColor?.CGColor
		}
	}

	@IBInspectable var cornerRadius: CGFloat = 0
	{
		didSet
		{
			layer.cornerRadius = cornerRadius
		}
	}

	@IBInspectable var shapeType: Int
	{
		set(newValue)
		{
			internalShapeType = min(newValue, 1)
			internalShapeType = max(0, internalShapeType)
		}
		get{
			return internalShapeType
		}
	}

	var internalShapeType: Int = 0

	@IBInspectable var shapeSize: CGFloat = 100.0
	@IBInspectable var shapeColor: UIColor?

	override func layoutSubviews()
	{
		let horizontalPoint: CGFloat = self.frame.width/2 - shapeSize/2
		let verticalPoint: CGFloat = self.frame.height/2 - shapeSize/2
		let shapeFrame  = CGRectMake(horizontalPoint, verticalPoint, shapeSize,shapeSize)

		let crossView = CrossView(frame: shapeFrame)
		let circleView = CircleView(frame: shapeFrame)

		let shapes = [0:crossView, 1:circleView]

		let shapeView = shapes[internalShapeType]
		shapeView!.shapeColor = shapeColor
		self.addSubview(shapeView!)
	}
}
Nothing here is that different from before except for how the shapeType variable is handled and how we change what shape is drawn.
To select which shape is used I used a dictionary with ascending integers as keys and the two shapeViews (circleView and CrossView) as objects. So depending on what the internalShapeType integer variable is set to the dictionary will return the corresponding object. But what if the integer is set above 1 or below 0?
The shapeType variable uses min and max operators in its set so that values below 0 and above 1 will not be passed to the internalShapeType. Unfortunately enums cannot be used for IBInspectable values so this is the best we can do for now.
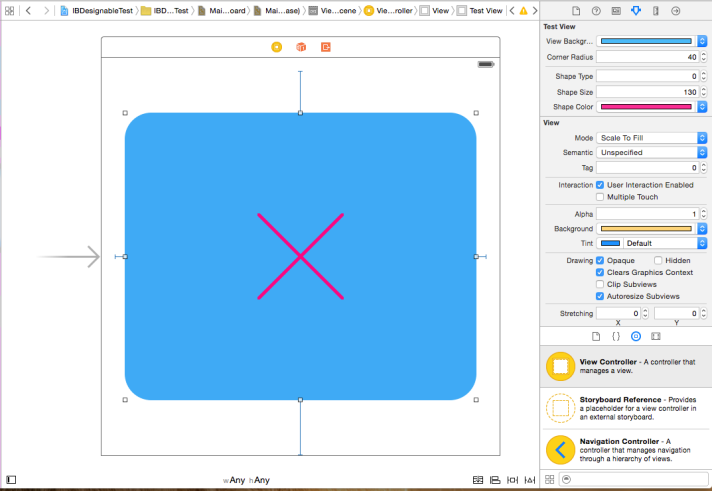
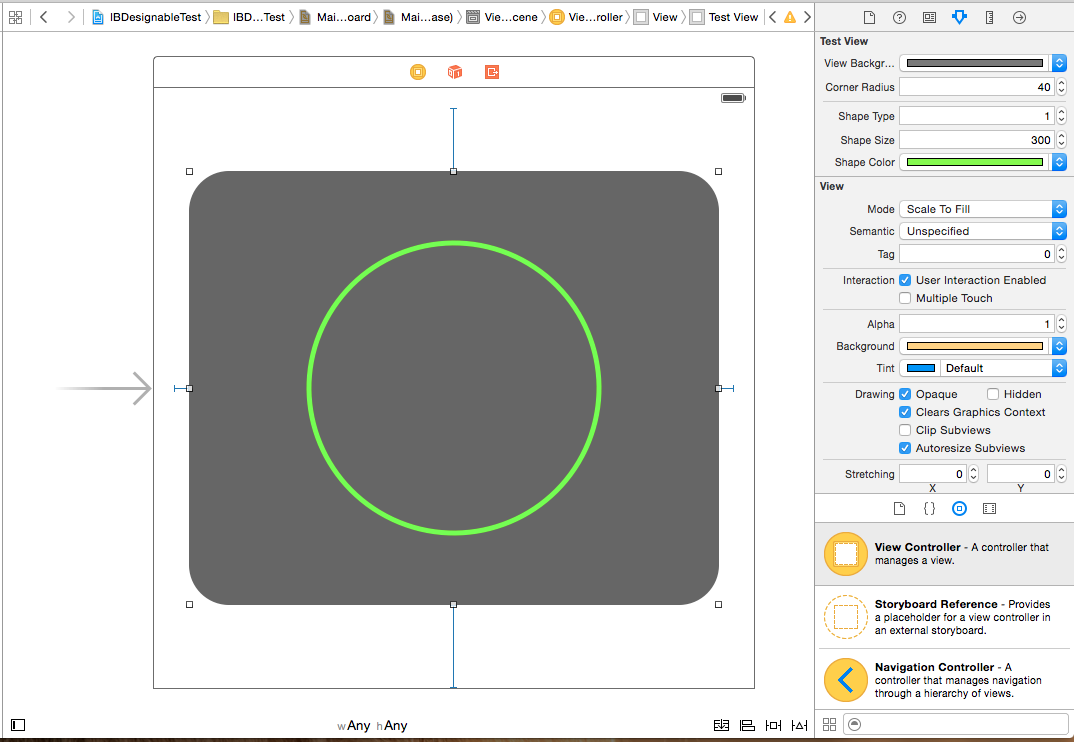
Open the Storyboard and add select the TestView. You should see the new IBInspectable properties have been added. Change them and the view will update automatically.

Great tutorial.
0 Pingbacks